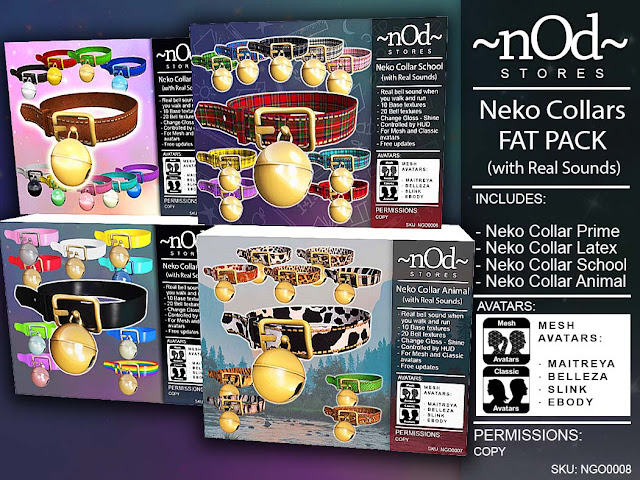
NEKO COLLAR - FAT PACK - (4 COLLARS)
Do you need a collar for every occasion?
A collar that makes you feel passion in the most hidden places of Second Life...
A collar that makes you feel your wildest side...
A collar that says who you are...
This is your pack.

This FAT PACK includes all these collars:
- Neko Collar Latex
- Neko Collar Prime
- Neko Collar School
- Neko Collar Animal
--------------------------------------------------------------------------------
Neko Collar Prime / Latex / School / Animal
(4 Rigged / Unrigged)
--------------------------------------------------------------------------------
Features:
--------------------------------------------------------------------------------
- Real bell sound when you walk and when you run!
(different sounds for both states).
--- Prime:10 Leather textures to change
--- Latex:10 Latex textures to change
--- School:10 Tartan fabric textures to change
--- Animal:10 Fur / Skin animal textures to change
- 20 Bell textures to change (each collar).
- Change metal shineness, glowness and brightness.
- About 6400 different combinations (each collar). Change everything!
- Rigged version works with Maitreya, Belleza (Isis, Freya and Venus), Slink (Hourglass) and eBody.
- Unrigged works with mesh and classic avatars. This version includes resizer script.
- Available demo.
Additional info:
-----------------------------------------------------------------------------
- Most collar textures will be used in future designs to get the perfect match.
- Join our VIP group for free to get all the info about these designs, items updates and special discounts.


HOW TO INSTALL
1- Search adquired item in your inventory. Write in the inventory search box: "Neko-Collar".
2- WEAR The box with the symbol "[]" to unpack the contents and click ACCEPT. Automatically the box will create a folder with the same name inside your Inventory and will drop items inside. Once the content is unpacked you can DETACH the box.
3- For quick search write in the search box: "Neko-Collar" and items and folder will appear.
4- Once you find your items select them and right click mouse (pc-windows) and select ADD.
5- Select the HUD item with right click mouse (pc-windows) and select ADD and the HUD will appear in your screen.
Note: The HUD works with both versions: Rigged and Unrigged version.
6- Once you select your colors / textures / properties quit the HUD clicking the "X" to avoid script lag.


